Guides for Arco 0.1.5
Quick start
Install Arco, connect a provider and open a project. This guide follows a fresh native package install. One provider and one project are enough; clusters, voice and summaries can be set up later.
Install and open Arco
Install Node.js 24 or 26 first. Windows also requires Git for Windows. Provider accounts and local models are configured separately.
Run these commands for a fresh install:
npm install -g arco-workbench
arco setupAlready installed? Use arco update or UPDATE AND RESTART in Arco. Finish or cancel running turns and save drafts and edits first.
For platform prerequisites and Docker installation, see the Arco README.
Setup asks before installing the per-user background service and creating an application shortcut. It then starts the service and opens Arco.
What happens nextThe workbench opens in the browser. Later, use the shortcut or arco open; arco open --tab opens a regular browser tab.
Welcome to Arco
A fresh install opens Welcome to Arco, even if provider command-line tools are already signed in.
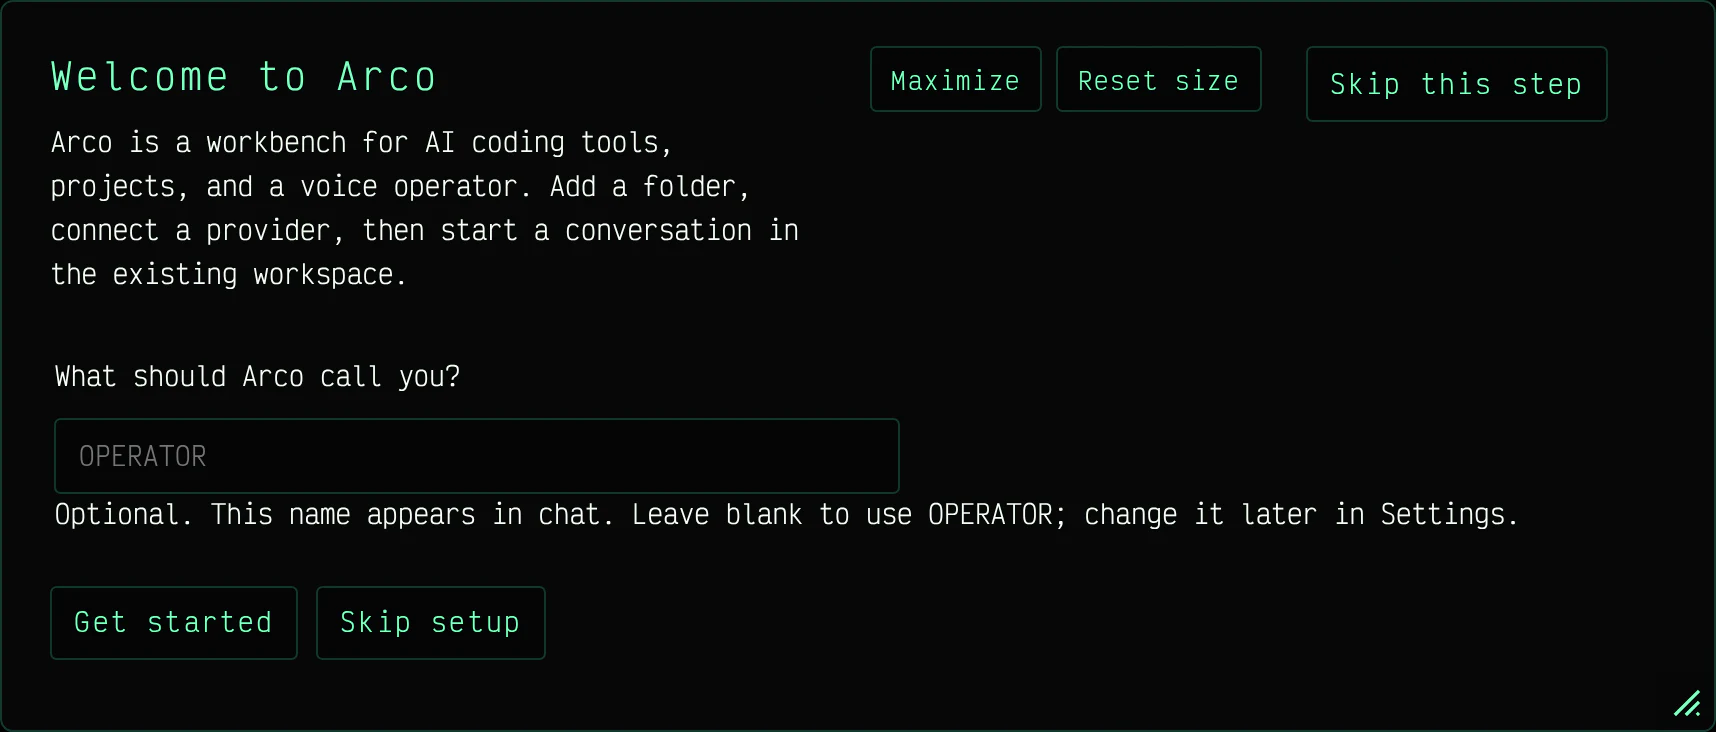
An optional name can be used for chat messages. Leaving it blank uses OPERATOR. Continue through the project and provider steps below.
Skipping a step is allowedSetup can be revisited under SETTINGS > Projects > Run setup again. Existing saved work is preserved.
Add project folders
A project location is a parent folder that contains projects. An individual project folder is the folder an agent will work in.
- Add project location
- Use this for a folder containing several projects. Give the location a name, then browse to it.
- Add a single project folder
- Use this for one project outside the usual locations, such as example-app.
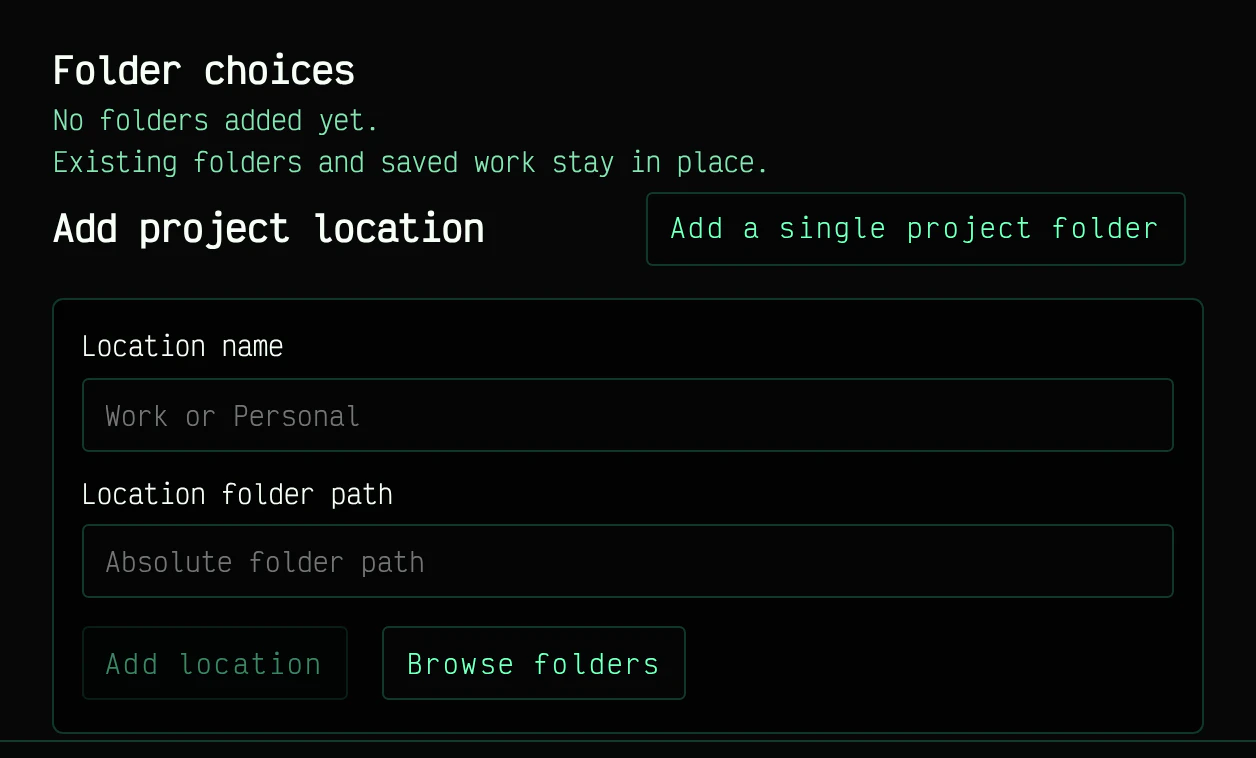
Add the choices to the summary, then select Continue. A location does not automatically choose its first project.
What happens nextHome lists project folders. Later, use Add project location or Open another folder to add work.
Project trust and saved state
Registration and trust are separate. An UNTRUSTED PROJECT notice offers TRUST or NEVER. Project instructions and skills are suppressed until the project is trusted; the choice can be changed in Settings.
Arco keeps global settings in its own data folder, and project workflows and settings in a hidden folder named .arco inside each project. Provider tools can keep their own sign-in data separately.
Connect the agents to use
The provider step opens Welcome - Connections. Choose a provider, follow its sign-in or configuration steps, then check the connection.
- Provider accounts
- Claude, Codex and Cursor have their own sign-in requirements. Follow the selected provider's row; some steps use an installed command-line tool or open a browser sign-in.
- Local models
- Ollama and llama.cpp use separately configured runtimes and models. LM Studio connects through its OpenAI-compatible HTTP endpoint; Arco 0.1.5 was tested against a simulated LM Studio server only.
- Optional integrations
- Strata and DeepSeek through Xolotl require separately installed services that Arco does not distribute.
These are the providers listed for 0.1.5. Support for an Agent tab does not imply support for every Chat or cluster mode; use the choices offered for that mode. See the provider reference.
More than one provider can be connected. A workflow chooses its provider and model when it starts. Optional integrations require their own services.
What Connected meansArco can reach the provider. Model availability and account quota are still checked separately.
Follow the completion screen to Go to Home. If provider setup was skipped, use CONNECT A PROVIDER later.
Choosing a model and a utility agent
Choose from the models that the selected provider offers. Supported effort levels depend on the model. Provider requests follow that provider's data and billing terms.
Welcome may also offer a utility agent for short tasks such as BRIEF, CATCH ME UP and TIDY. It is optional and is not selected silently. It can be configured later in SETTINGS > Agents and clusters.
Start a project session
- Select New session on a Home project card.
- Choose a connected provider and an available model.
- Choose permissions. Use SAFE for an unfamiliar repository.
- Select LAUNCH WORKFLOW.
- Send a small, specific request in the composer.
Read the README and explain how to run this project. Do not change any files.
What happens nextA workflow tab opens with one agent. The conversation shows its replies and current work step. The composer holds the next message; the right panel holds project tools.
Try WORKSPACE > FILES to inspect the project, or RUNTIME > CONFIG to inspect the agent settings. See the interface tour.
Ask the agent to use Arco
Arco gives the agent workflow instructions and tools. You can ask for actions in the conversation, including creating a plan, without starting from a button. Available actions depend on the provider, mode and permissions; this does not give every agent control of every interface feature.
For example: "Create a plan for this project and attach it to this workflow. Do not start implementing it." Arco supplies instructions for creating and attaching a plan when none is attached. Open PLAN to inspect the result. See how plans work.
If LAUNCH WORKFLOW is disabled, see the recovery steps.
Before asking for changesRead the reply and check the project files. Use the next message to clarify the intended change, then attach a plan if the work needs several steps.
For a conversation without project tools, choose CHAT and START CHAT instead.
Choose what to try next
Voice setup is available when speaking to Computer would be useful.
The in-app HELP menu offers POINT AT THINGS for individual controls and USER MANUAL for fuller explanations.
If something goes wrong
Inspect the installation
Run arco doctor to inspect the runtime, provider tools, port and service. Follow the Operations guide for the reported problem.
If LAUNCH WORKFLOW is disabled
Check the selected provider in Connections. A saved default can remain selected even when it is not connected. Select a connected provider or finish sign-in, then choose an available model.
Uninstall a package install
Stop in-flight work and close the Arco browser window, then run:
arco service uninstall
npm uninstall -g arco-workbench
The first command removes the service and its owned shortcut. Saved settings and work remain. Permanent data deletion is separate; follow the full uninstall instructions only if that data should also be removed.